Installing Studio
Erizos Studio can be set up in two configurations:
- Single Client Setup - Suitable for simple, single studio configurations with only one control client.
- Distributed Clients Setup - Ideal for larger installations with multiple control clients.
Note
Single Client Setup: Content created on the client is only available on that client.Distributed Clients Setup: Necessary for sharing content across multiple clients.
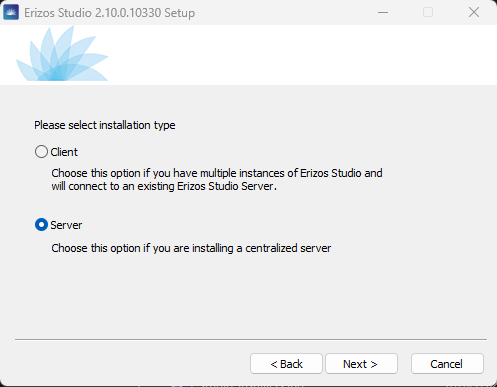
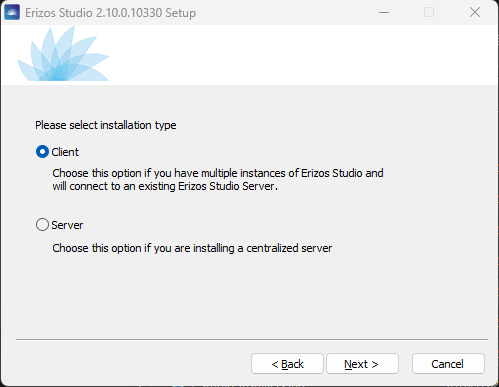
On the Please select installation type page you choose what to install on the machine you are installing on: Client or Server. These are radio buttons, so exactly one of them is selected - you cannot install both in a single run.
Note
To put the server and a local control client on the same machine - the usual choice for a single-machine setup or a demo system - run the installer twice, once with Server and once with Client, or pass both /Server and /Client on the command line. On a distributed setup, choose Server on the server machine and Client on each control machine.
Installation Steps
Step 1: Install Erizos Studio Server
- Go to our Portal →
Products→ press theDownloadbutton (in theReleasecolumn) in theErizos Studiorow. - Run the installation file, choose
Serverand complete the installation. - Navigate to
http://[SERVER IP]:5550in your browser to confirm successful installation.
Info
The server installation also installs DataHub (the MongoDB database, on localhost:5050) and runs the data upgrade scripts against it, installs and starts the Studio.Service Windows service, adds a firewall exception for Studio.Engine.exe, and creates a desktop and Start-menu shortcut Erizos Studio Server pointing at http://localhost:5550. It also places the Agent, Client and Unreal Engine plugin installers into C:\Program Files\Erizos\Studio Server\External\Installers, which is what the Admin → Installers page serves.
Error
If you see a License Error when launching Studio, it usually means that Erizos Server was installed before Erizos Licenses. See the License Troubleshooting page for resolution steps.
Step 2: Install Erizos Studio client
For Single Client Setup:
- on the client machine, run the same installation file used in Step 1 and choose
Client.
For Distributed Clients Setup:
- connect to the Server: on the control client machine, open your browser and navigate to
http://[SERVER IP]:5550(server ip - the IP of the machine on which Erizos Studio Server is installed) - log in:
Default Username:
adminDefault Password:admin - download the
Studioinstaller:- open the user menu and select
Admin Settings - go to the
Installerspage - download and launch the
Studioinstaller
- open the user menu and select
-
repeat these steps on each control client machine.
Note
The Studio installer served by the Admin → Installers page is the Client installer. It has no installation type page and installs the Client directly.
Step 3: Connect Client to the Server
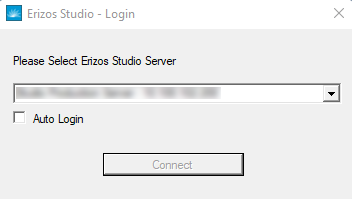
- Launch the client desktop application on each control client machine.
- On the initial screen, select the
serverfrom the dropdown menu.
If the correct server is not listed, manually enter the server IP.
Step 4: Install Erizos Agent on the Renderer Machine
- The Studio Client ships with a built-in Agent, so a machine that only runs the Client needs nothing extra.
- Install the Agent on the Server machine and on every machine running a render engine. Download it from
Admin Settings→Installers→Agent. For detailed instructions, see Installing Erizos Agent
Installing Erizos Studio with Command-Line Arguments
The Installer also supports command-line arguments, providing a convenient way to customize the installation process.
To execute the installer with command-line arguments:
- Open a
Terminal. - Add the Command-Line Arguments you want to execute in the Installation Process.
Example Argument:
1 | |
| Command Argument | Description |
|---|---|
/S |
Executes the installer silently, without user prompts. |
/Client |
Installs the Client. Also triggers as a Silent installation. |
/Server |
Installs the Server. Also triggers as a Silent installation. |
Note
/Client and /Server can be combined - Erizos-Studio-x.x.x.xxxxx.exe /Server /Client installs the server first and then the client on the same machine. This is the only way to get both in a single run; the installation type page itself is a choice between the two.
Note
/S on its own runs silently with the default choice rather than prompting: Server on a machine where a Studio Server is already registered or on a fresh machine, and Client where the machine is already registered as a Client. An existing Client is upgraded in any case.