Caching CreativeHub Projects to Outputs
The Cache Outputs feature lets you push a CreativeHub project to an output running the Erizos Agent. You connect to the Studio server, choose a profile, pick which outputs to cache to, and publish, all from CreativeHub with no manual copying.
Before you start
The agents for the engines you want to cache to must be connected. Outputs whose agent is offline are greyed out and can't be selected.
Opening Cache Outputs
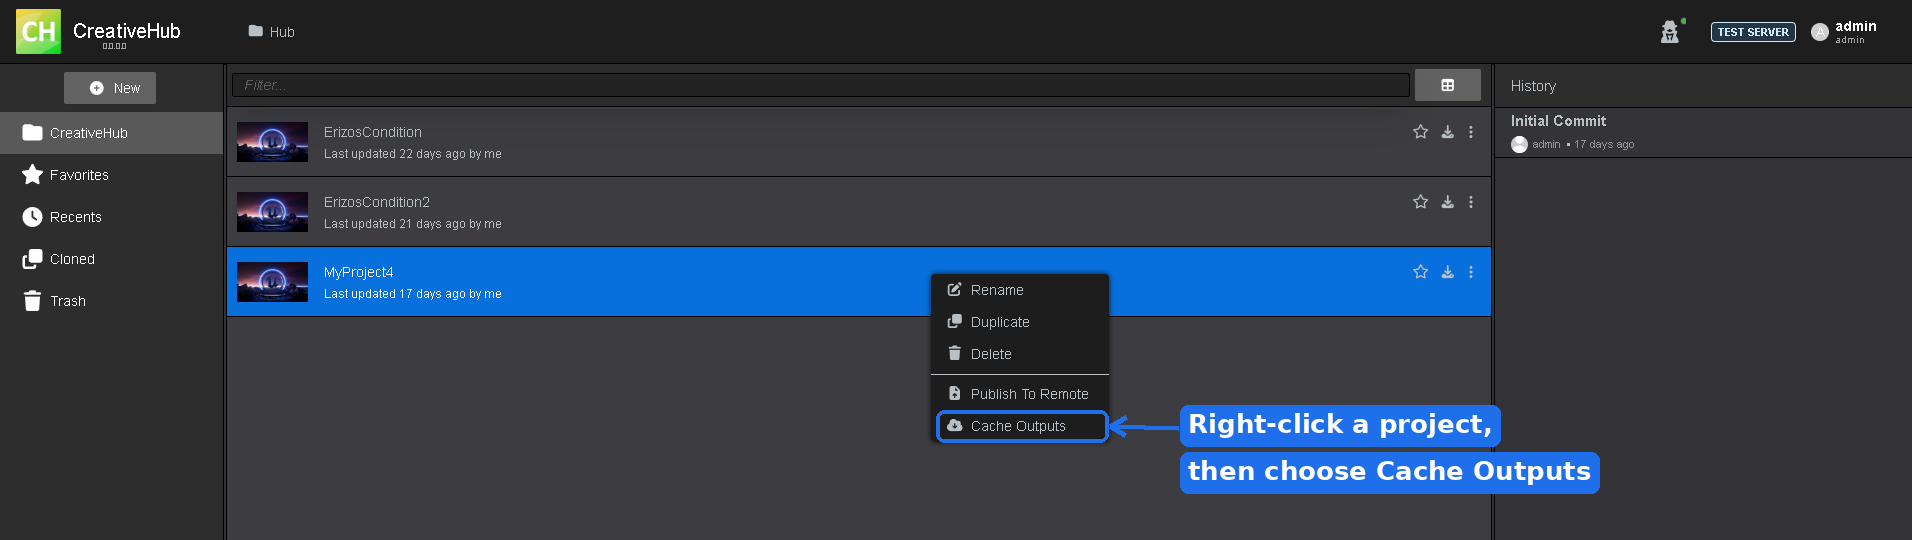
In CreativeHub, right-click the project you want to cache and choose Cache Outputs from the menu. The wizard opens with three steps: connect to Server, select a Profile, and Cache.
Step 1 – Server
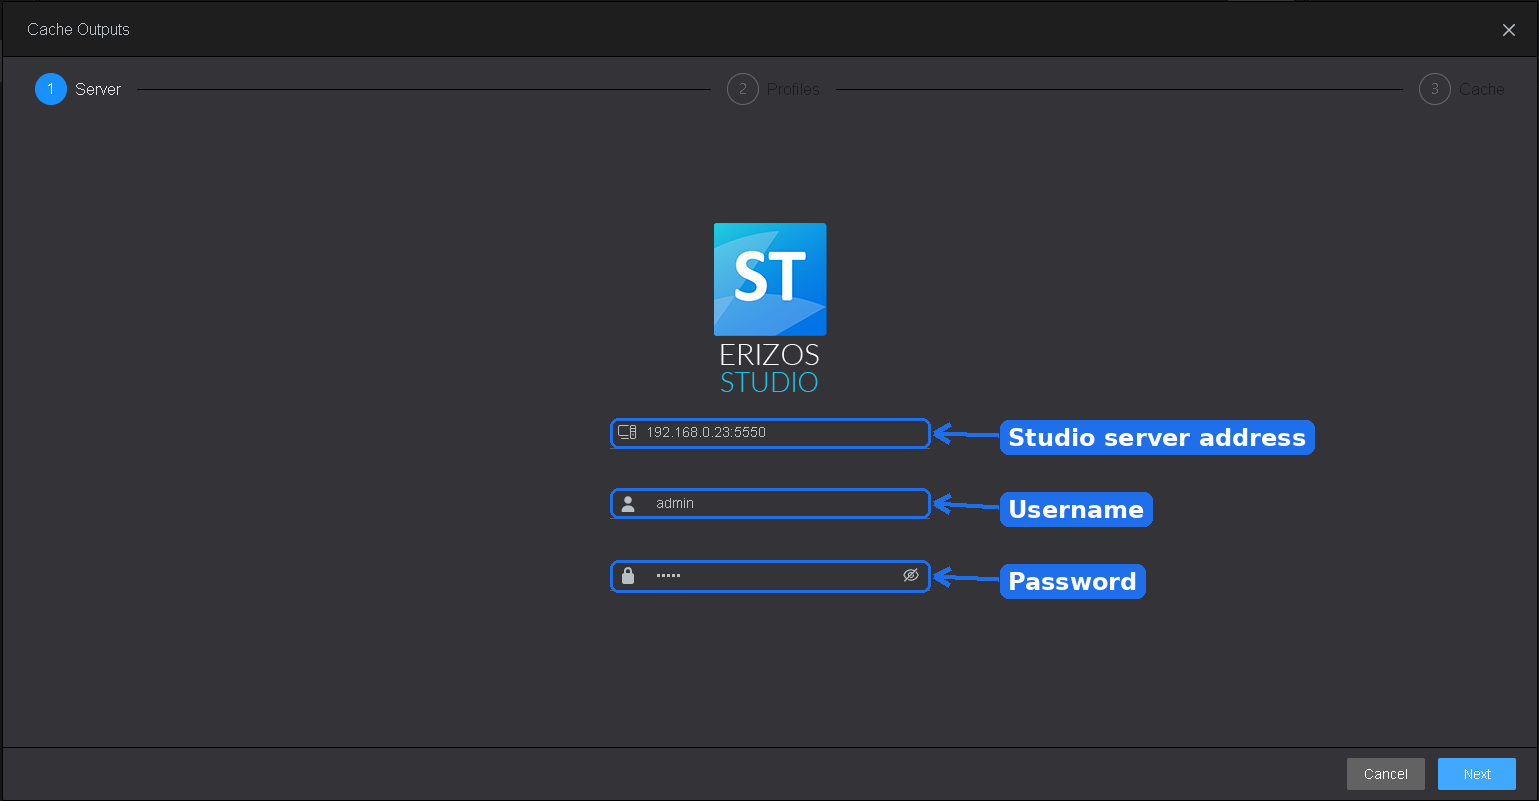
Connect to the Studio server you want to cache to. Enter its address, your username and password, then click Next.
Step 2 – Profiles
Select a profile from the dropdown. A tree of that profile's channels and outputs appears below it. Select the outputs you want to cache to. At least one output must be selected to continue.
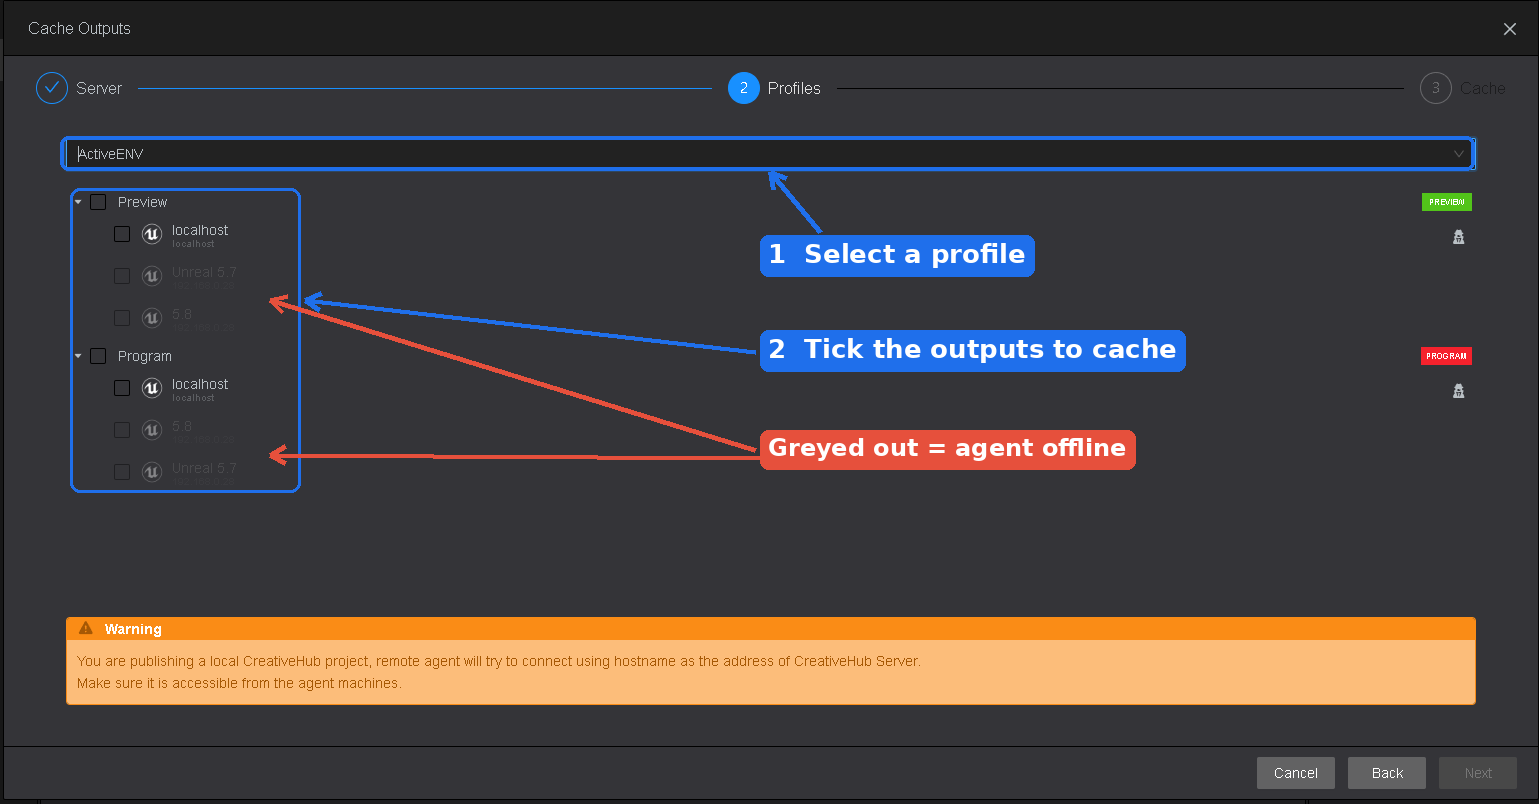
Hover over a greyed-out output to see a tooltip with the reason it's disabled. This is normal and just tells you what can and can't be cached right now:
| What you see | What it means |
|---|---|
| Output greyed out | The agent for that engine is not connected, so it can't be cached. Hovering shows the tooltip "Agent is disconnected". |
| Channel greyed out | The channel has nothing to cache. Hovering shows the tooltip "Channel has no available outputs to cache". |
| Next is disabled | No output is selected yet. Select at least one output to continue. |
Warning
When you cache a CreativeHub project, the remote agent connects back using the hostname as the CreativeHub Server address. Make sure that address is reachable from the agent machines.
Step 3 – Cache
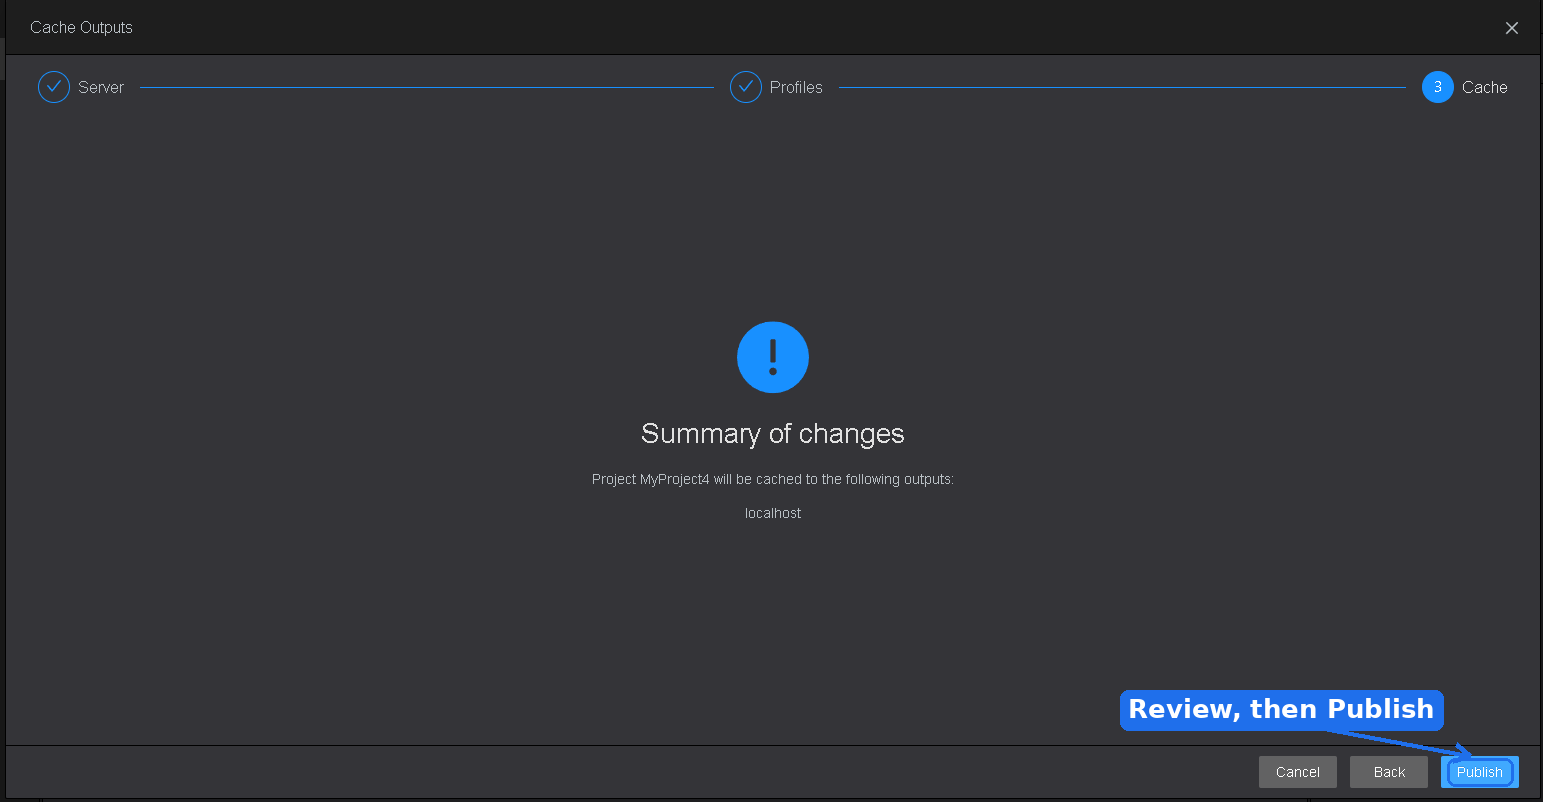
Review the summary of what will be cached, then click Publish. The selected project is cached to the selected outputs.